How can I change my Windows Boot / Logon Screen?
Q) What is the windows boot screen?
This is what the Windows Boot Screen is (Windows XP Pro shown):
Q) What is the Logon screen (again Windows XP shown):
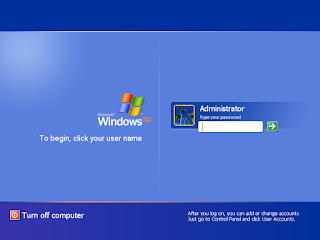
OK, so now you know what we're on about being able to change; if you weren't before that is.
Q) How do we customise these screens then?
Easy to do. Firstly you need to go and install the software which you need to do this with.
1) Download and Install the software needed to customise the screen(s)
Install the BootSkin for Windows XP (last release is 1.5a) or Vista (Windows 7 isn't supported yet) by visiting the following link:
http://www.stardock.com/products/bootskin/downloads.asp
For customising your Windows Logon screen you will need to download and install LogonStudio (which does support Windows 7 as well as Vista and XP):
http://www.stardock.com/products/logonstudio/
NOTE: You don't need both if you only want to change one screen; so download and install the ones you will use.
2) Find a skin to use instead of the default (note you can always revert back so don't worry)
To get skins (which are images you use to change the default screen); visit the 'Get [Windows Version] Skins' links at the top of the links within the previous paragraph.
Or go direct to the web site http://www.wincustomize.com/ and use the menu (currently on the right hand side of typing this post, scroll down a bit). You can then use the search feature.
Why not make your own logon or boot skin? See question at the end of this post on how to do this!
Note: It's best to use the links from the StarDock web site to make sure you are getting the correct skins.
3) Download the Skin and apply it using the StarDock software
a) Once you have found the skin you would like to apply as your boot / logon screen; simply click the download button on the wincustomize web site skin page and save the file somewhere temporary like "My Documents".
b) Open the BootSkin or LogonStudio application and use it to apply your chosen skin. You can simply click on the file as well which should open with the correct application.
BootSkin Note: You may need to import the skin in order to select it in the list if clicking on the file does not open the application. To do this click on 'File > Import from file', navigate to where you downloaded the skin to and click on open once you have the skin file selected.
LogonStudio Note: You need to unzip .zip files before you can open the skin in LogonStudio. Use 7-Zip (OpenSource) or other (winzip or winrar etc).
Need help?
Visit the following forum links for support: BootSkin Forum / LogonStudio Forum
Q) Can I create my own logon or Boot screen skin?
YES!
Visit the appropriate link below to create your own. If you think it is good, then upload it and share it on the wincustomize web site for others to enjoy too!
NOTE: You do not need to use Photoshop. If you like you can use Paint Shop Pro, or an OpenSource application such as http://www.gimp.org).
Boot Skin Tutorial
LogonStudio: Use the 'New' button to create your own ... see below for help ...
Comes with it's own Help which is installed with the application on your local hard drive (or where ever you install it to). However, you might find this post useful.